Blog
Red Light Therapy Facial Results: Visible Changes?
I’m a certified dermatology tech with seven years of experience giving phototherapy treatments. I’ve seen firsthand how many people are getting curious about at-home red light devices for their face. My patients keep asking me the same thing – how long until they actually see improvements in their skin texture, fewer wrinkles, and clearer complexion from red light therapy? This guide will show you the real red light therapy before and after face results you can get with regular use. I’m backing this up with clinical evidence and my own practical experience.
Table of Content
- First, let’s talk about what red light therapy actually is and how it works on your face.
- Here’s the realistic timeline for when you’ll start seeing red light therapy before and after changes in your face.
- How to track your own red light therapy journey and document your progress.
- Let me show you how to get the most out of your treatments for the best red light therapy before and after face results.
- I’ll also cover common worries and what red light therapy can’t actually do for your face.
- Plus, tips on picking the right at-home device and understanding those return policies.
- And of course, I’ll answer the questions I hear most often about red light therapy for facial rejuvenation.
Defining Red Light Therapy and Its Facial Applications
Photobiomodulation Fundamentals
Core Mechanism: Red light therapy devices use special wavelengths, usually between 630-670nm, that go deep into your skin to boost your cells energy. This process is called photobiomodulation, and it supercharges your skin cells mitochondria.
making them produce more ATP energy. That extra cellular energy speeds up repair work, cuts down oxidative stress, and boosts collagen production – that’s the key protein keeping your skin firm and elastic.
Clinical Evidence: Lots of solid studies back this up, like one from 2014 in Photomedicine and Laser Surgery, showing people’s skin looked and felt much better after regular red light therapy sessions.
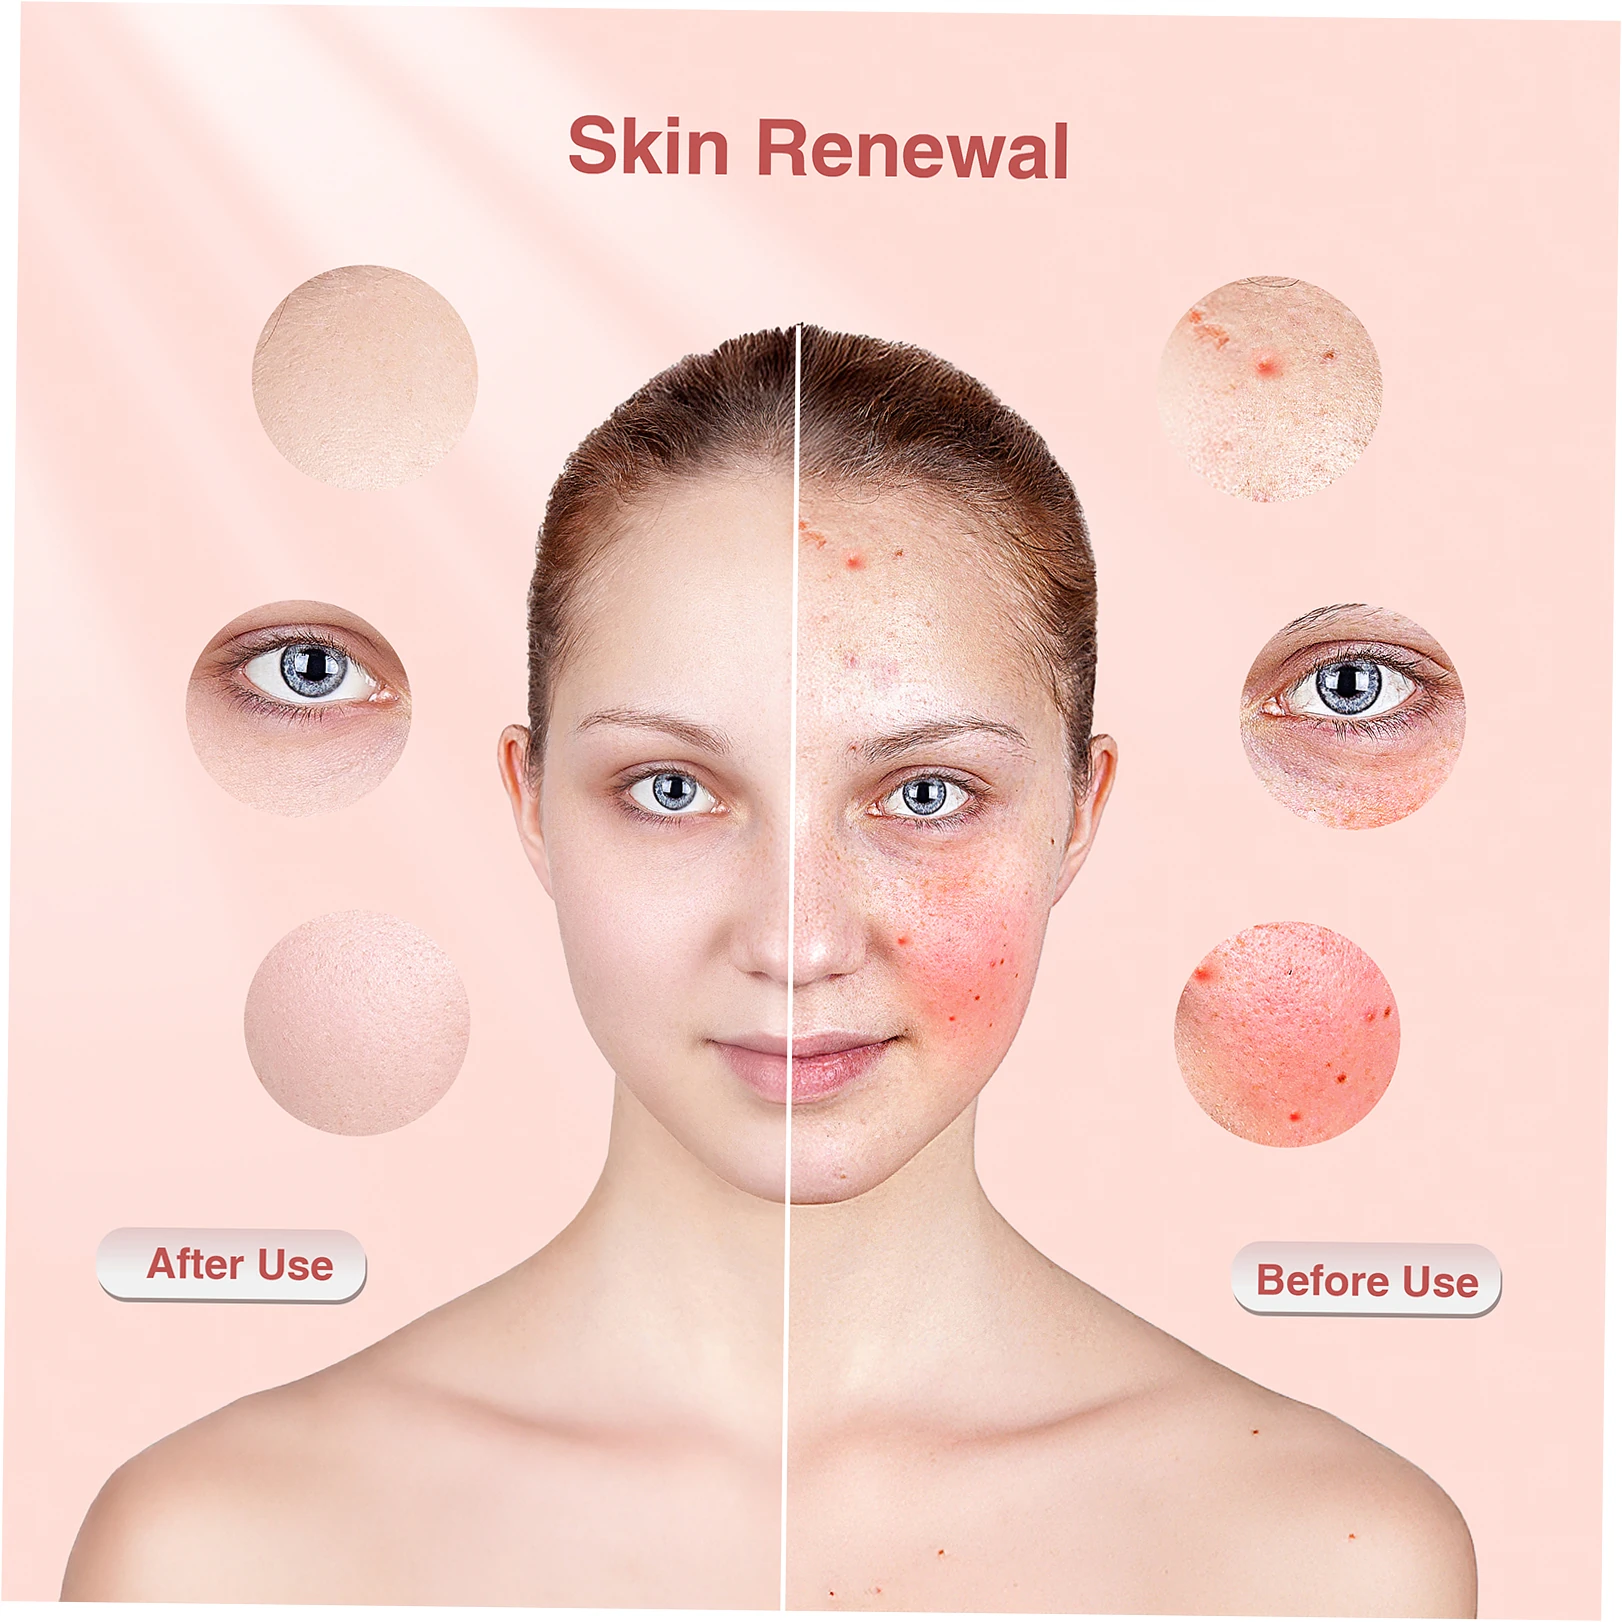
The people in these studies actually grew more collagen – biopsies proved it – plus their skin got smoother and their texture improved. These biological changes are exactly what creates those amazing red light therapy before and after face results everyone wants to see.
Primary Facial Benefits and Expected Outcomes
Collagen Induction: When you use red light therapy regularly, it tells your fibroblasts to make more collagen, which plumps up your skin and smooths out fine lines and wrinkles.
Most people start seeing firmer skin within 3-4 weeks of steady use, but the really noticeable red light therapy before and after face changes show up after 8-12 weeks.
That extra collagen fills in those shallow wrinkles and boosts your skin’s bounce-back power, giving you that younger look you see in before and after photos.
Reduction in Inflammation: Red light therapy’s anti-inflammatory powers work great if you deal with rosacea, acne, or just general facial redness. It soothes irritated skin and dials down inflammation.
so many users see less redness and fewer breakouts after just a few weeks. This evens out your skin tone beautifully, which really shows in those red light therapy before and after face pictures, especially if you’ve got sensitive skin.
Here’s a realistic timeline for red light therapy before and after face results, from your very first session to when you’ll actually see changes.
During the first month of red light therapy, here’s what you can expect to see in your before and after face results.
Right after your first few red light therapy sessions, you might notice your skin gets an instant healthy glow. Your skin feels more hydrated too because blood flow increases.
These early changes aren’t permanent yet, but they show the red light therapy is already working to wake up your skin cells. Your skin might look a bit plumper for now, but if you want real, lasting improvements in your before and after face results, you’ll need to stick with it for several weeks.
After about three weeks of regular use, doing red light therapy 3-5 times each week, you’ll probably see small but real changes. Your skin texture gets smoother and your complexion looks brighter.
Right after each treatment, those fine lines might look softer. Keep going with your red light therapy sessions and these improvements will last longer. Take before and after photos regularly – that’s the best way to see the gradual changes in your face that you might miss day to day.
Now we get to the really exciting part of red light therapy – the transformative phase from weeks 5 to 12.
One clinical study found that after 12 weeks of regular red light therapy, people saw about 30% better skin texture and wrinkles that were 15% less deep.
These aren’t just temporary fixes – your skin is actually changing for the better at a structural level. The biggest wow moments in your red light therapy before and after face journey usually happen around 10 to 12 weeks, as long as you’re consistent.
By this point, your collagen production is really kicking in. You’ll notice your skin looks tighter, pores seem smaller, and dark spots start fading. After you hit your goals.
just 2-3 sessions each week will help you maintain those great red light therapy results. Here’s a quick timeline of what to expect with red light therapy for your face:
| Time Period | Typical Changes | Clinical Evidence |
|---|---|---|
| Weeks 1-2 | Improved skin hydration, subtle glow | Increased microcirculation |
| Weeks 3-4 | Enhanced texture, reduced redness | Decreased inflammatory markers |
| Weeks 5-8 | Visible fine line reduction, improved elasticity | Measurable collagen increase |
| Weeks 9-12 | Significant wrinkle reduction, firmness improvement | 30% texture improvement in studies |

Documenting Your Red Light Therapy Journey
Creating Effective Before and After Comparisons
First, take some good quality photos before you start red light therapy for your face. Make sure the lighting is the same every time. Use soft natural light and keep the same distance, angle, and expression.
This way your before and after face comparisons will be accurate. Snap pictures from different angles – front, both sides, and side views. This helps you see all the changes in your skin’s texture, tone, and firmness throughout your red light therapy journey.
Keep a simple skincare journal too. Write down things you’re concerned about – like pore size, redness, fine lines, and how your complexion looks. Each week, give each concern a score from 1 to 10.
This helps you actually see your progress with red light therapy before and after results. Doing it this way helps you spot improvements you might otherwise miss. Plus, you get real proof of your face transformation from red light therapy.

Interpreting Results Realistically
Now, everyone’s results will be different. Your age, skin condition, what device you use, and how consistent you are – all these affect your red light therapy before and after face results.
Younger people with less sun damage usually see changes quicker. But if you have mature skin with more sun damage, it’ll take longer to see those before and after differences.
Your genes, daily habits, and skincare routine also play a role in how fast and how much improvement you’ll see in your red light therapy before and after photos.
Here’s the thing about expectations – red light therapy works gradually. You’ll see small improvements that add up over time, not big changes overnight.
Sure, some before and after pictures you see online look amazing, but those are usually the best-case scenarios after using it regularly for a long time. Keeping realistic expectations helps you stay motivated, especially during those first few weeks when changes to your face are still subtle.

Optimizing Treatment Protocol for Maximum Benefits
Session Frequency and Duration Guidelines
When you first start red light therapy for your face, aim for 3-5 sessions each week, spending 10-20 minutes per session depending on how strong your device is and how sensitive your skin feels.
Sticking to your routine matters more than doing extra-long sessions because the benefits build up over time. Most studies that show amazing before and after face results used this same frequency range.
Once you see the before and after changes you want, usually after 8-12 weeks, cut back to just 2-3 sessions weekly to keep your results looking good. Just like working out, red light therapy needs regular use to keep working.
If you skip your maintenance sessions, you might slowly lose those improvements because your collagen production goes back to normal without the regular light stimulation.
Enhancing Treatment Efficacy
Before each red light session, wash your face well to get rid of anything that might block the light, like makeup, sunscreen, or other skincare products.
Some experts suggest gently exfoliating once or twice a week to clear away dead skin that could stop the light from absorbing properly, but don’t scrub too hard or you’ll irritate your skin.
Boost your red light therapy results by using proven skincare products like vitamin C serum to help collagen production and hyaluronic acid for extra moisture. Just don’t put any photosensitizing products on right before your sessions.
When you combine red light therapy with the right skincare, you’ll see those before and after face results much faster.
| Treatment Phase | Frequency | Duration | Complementary Care |
|---|---|---|---|
| Initial (Weeks 1-4) | 3-5 sessions weekly | 10-15 minutes | Gentle cleansing, hydration |
| Building (Weeks 5-8) | 4-5 sessions weekly | 15-20 minutes | Vitamin C, peptide serums |
| Results (Weeks 9-12) | 3-5 sessions weekly | 15-20 minutes | Targeted treatments for concerns |
| Maintenance (Week 13 ) | 2-3 sessions weekly | 10-15 minutes | Consistent skincare routine |
Addressing Common Concerns and Limitations
Managing Expectations and Potential Side Effects
When you first start red light therapy, you might notice some slight redness or a warm feeling on your face. That’s just your blood circulation getting better.
These temporary effects usually fade within an hour, and they’ll happen less often as you keep using your red light therapy. The great thing about red light therapy is it doesn’t cause peeling.
major irritation, or recovery time like some stronger treatments do. You can use it and go right about your day.
Contraindications and Precautions: If you have sensitive skin to light, take medications that make you more sensitive to sun, or have had skin cancer before, it’s smart to check with a dermatologist first before trying red light therapy.
Even though red light therapy is pretty safe for most people, getting medical advice helps you get recommendations that fit your specific skin and health needs.
Recognizing Therapy Limitations
Realistic Outcome Parameters: Red light therapy does help your skin look better, but don’t expect the same dramatic results as a facelift or professional laser treatments. It works differently.
Your skin improves slowly over time with red light therapy. It helps your skin work better naturally instead of giving you sudden, dramatic changes. Knowing what to expect from red light therapy helps you have realistic expectations about your before and after face results.
Combination Approach: If you’re dealing with serious sagging, deep wrinkles, or lots of sun damage, red light therapy works best when you combine it with other approaches.
Think professional treatments, good skincare products, and always using sun protection. Red light therapy is more about boosting your skin’s overall health. It won’t replace medical treatments you might need for specific skin issues.
Selecting Equipment and Understanding Policies
Choosing Effective Home Devices
When picking a device, look for ones that give off red light around 630-670nm and near-infrared between 810-850nm. You’ll want enough power too, usually 50-200 mW/cm², to make your red light therapy before and after face results really effective.
It’s smart to choose FDA-cleared devices that have actual studies backing them up for facial skincare. Good build quality, solid safety features, and buying from a trusted maker keep you safe and make sure the treatment works well for your before and after face transformation.
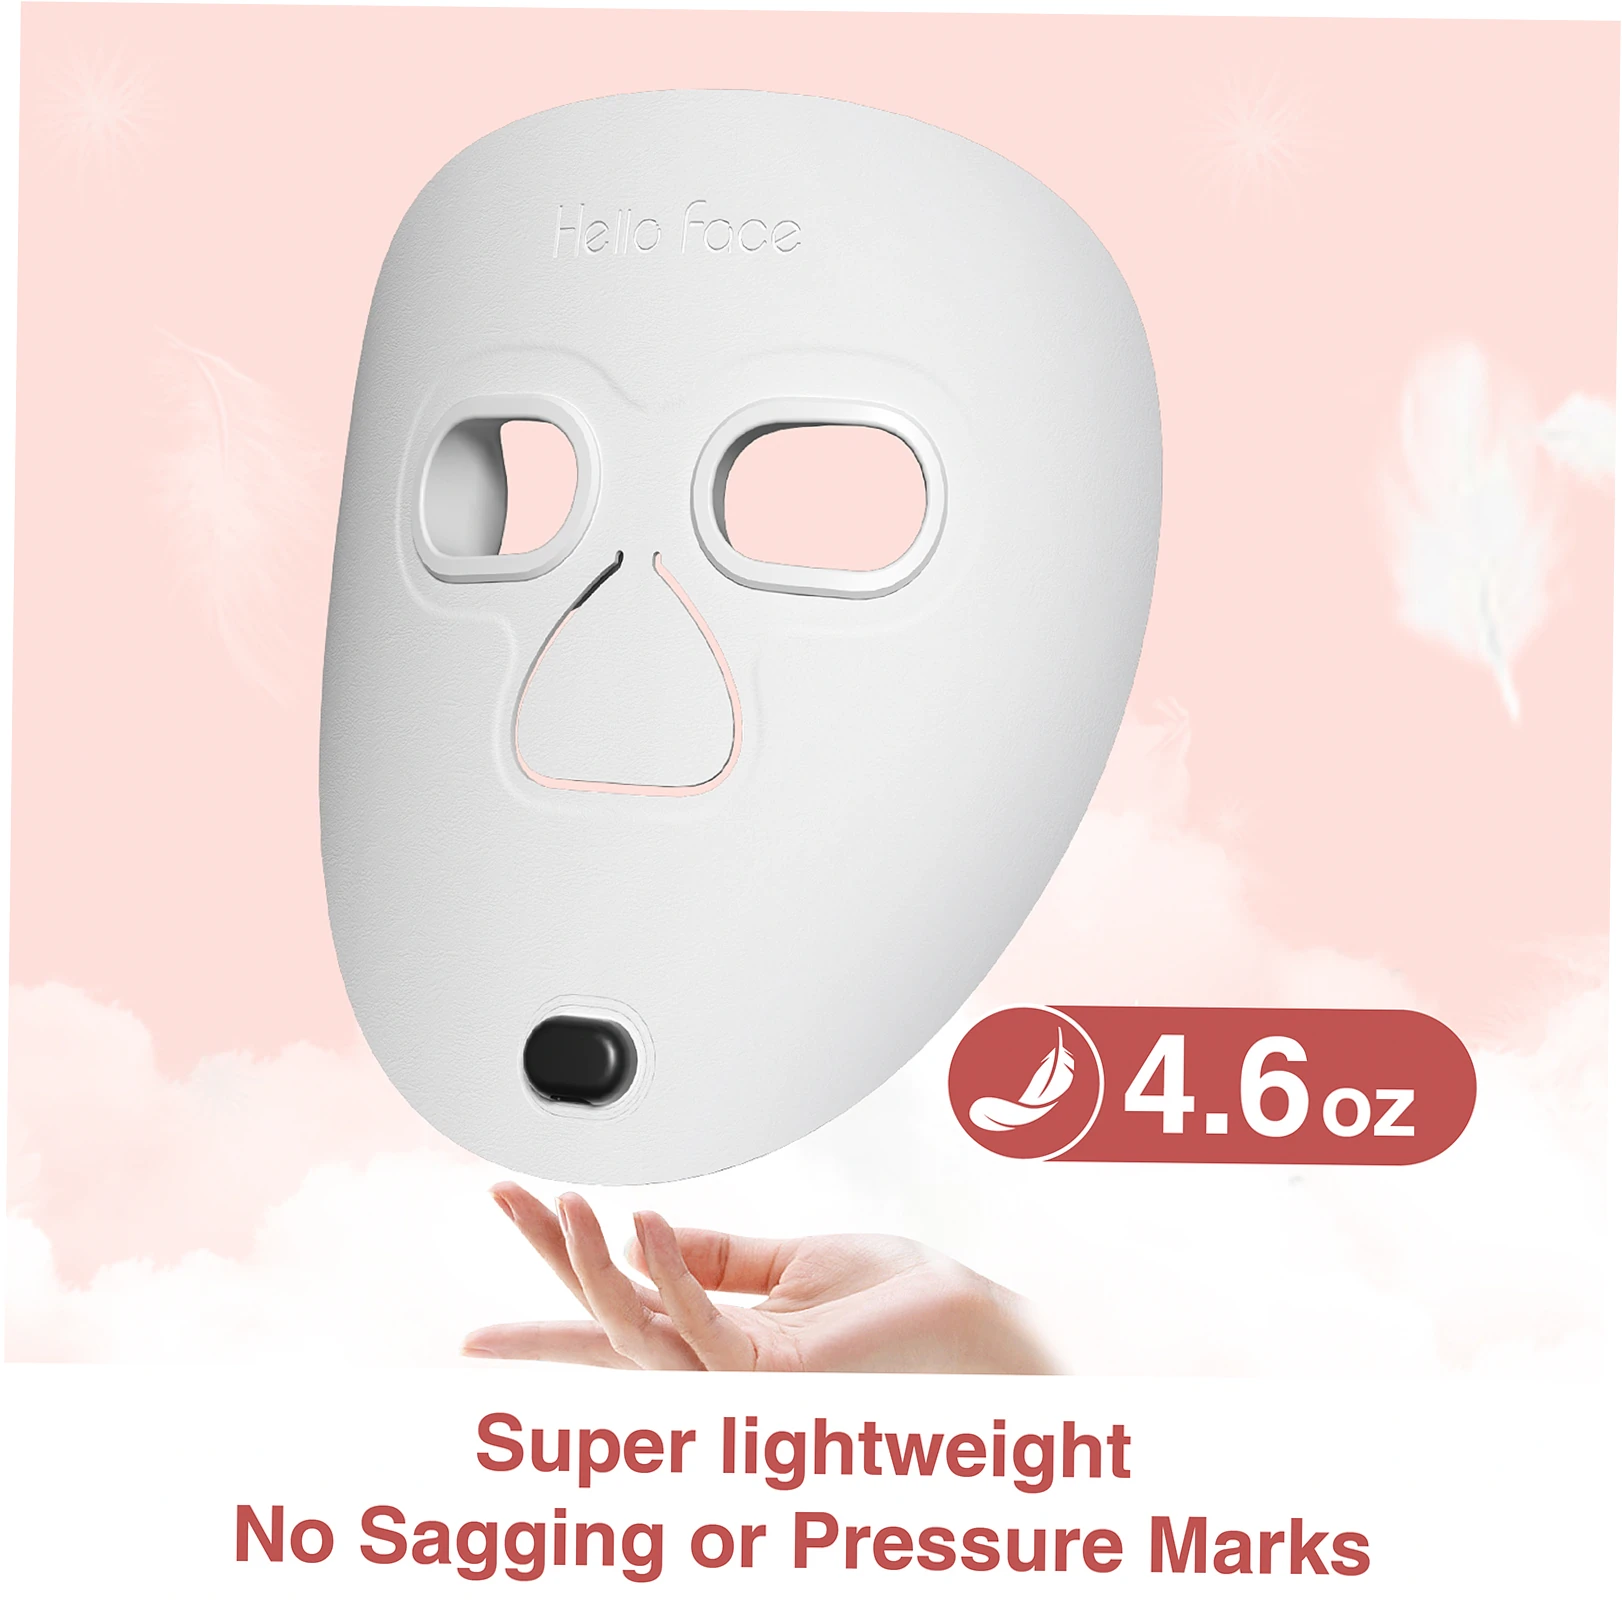
Think about how you’ll use it on your face – is it comfortable, easy to handle, and does it cover the right areas? If the device is awkward or tricky to use, you’ll probably skip sessions, and that won’t give you the before and after changes you want.
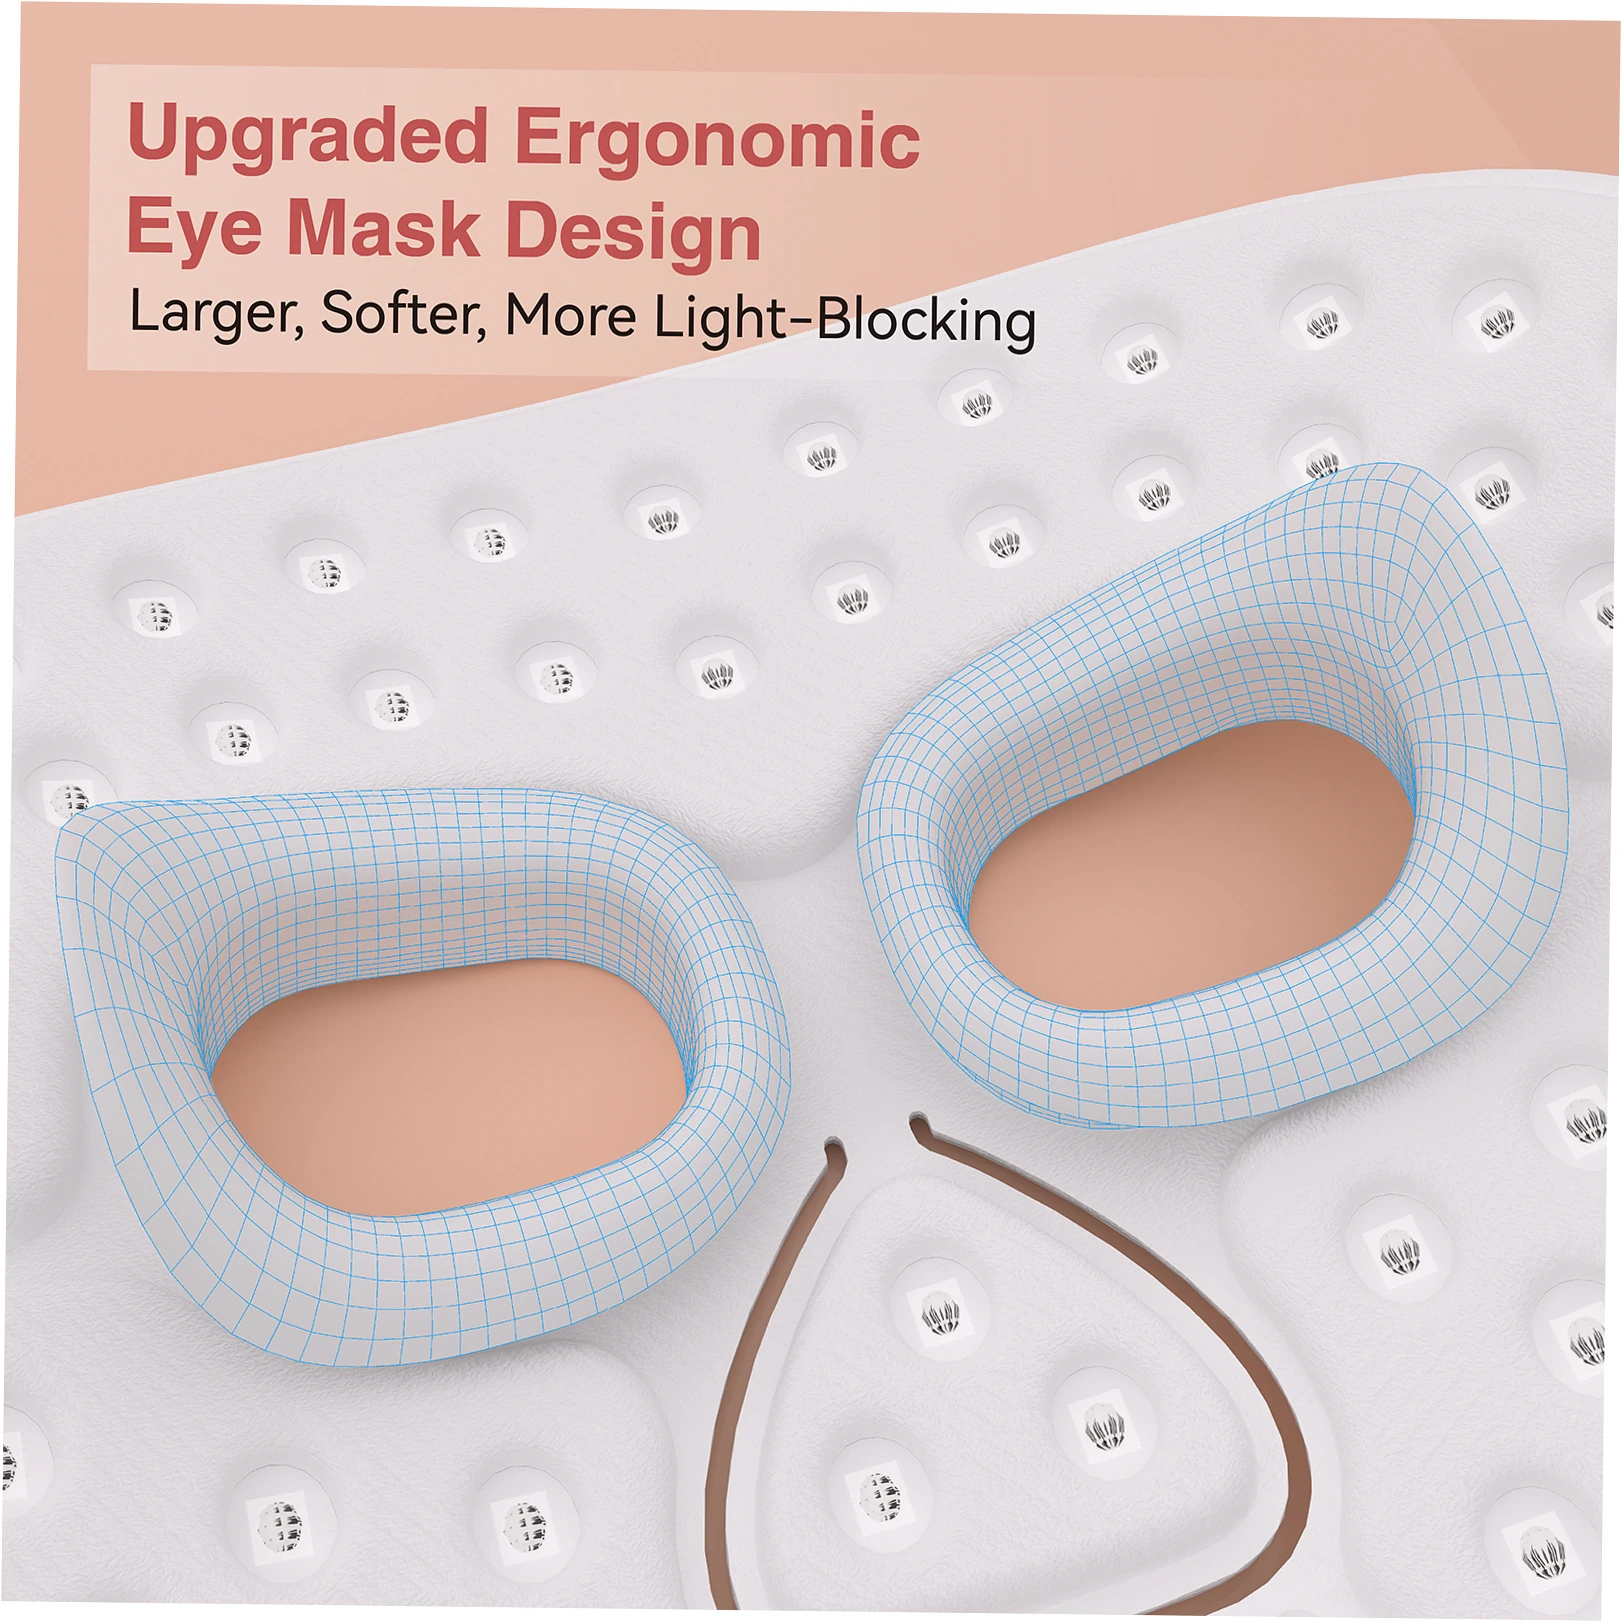
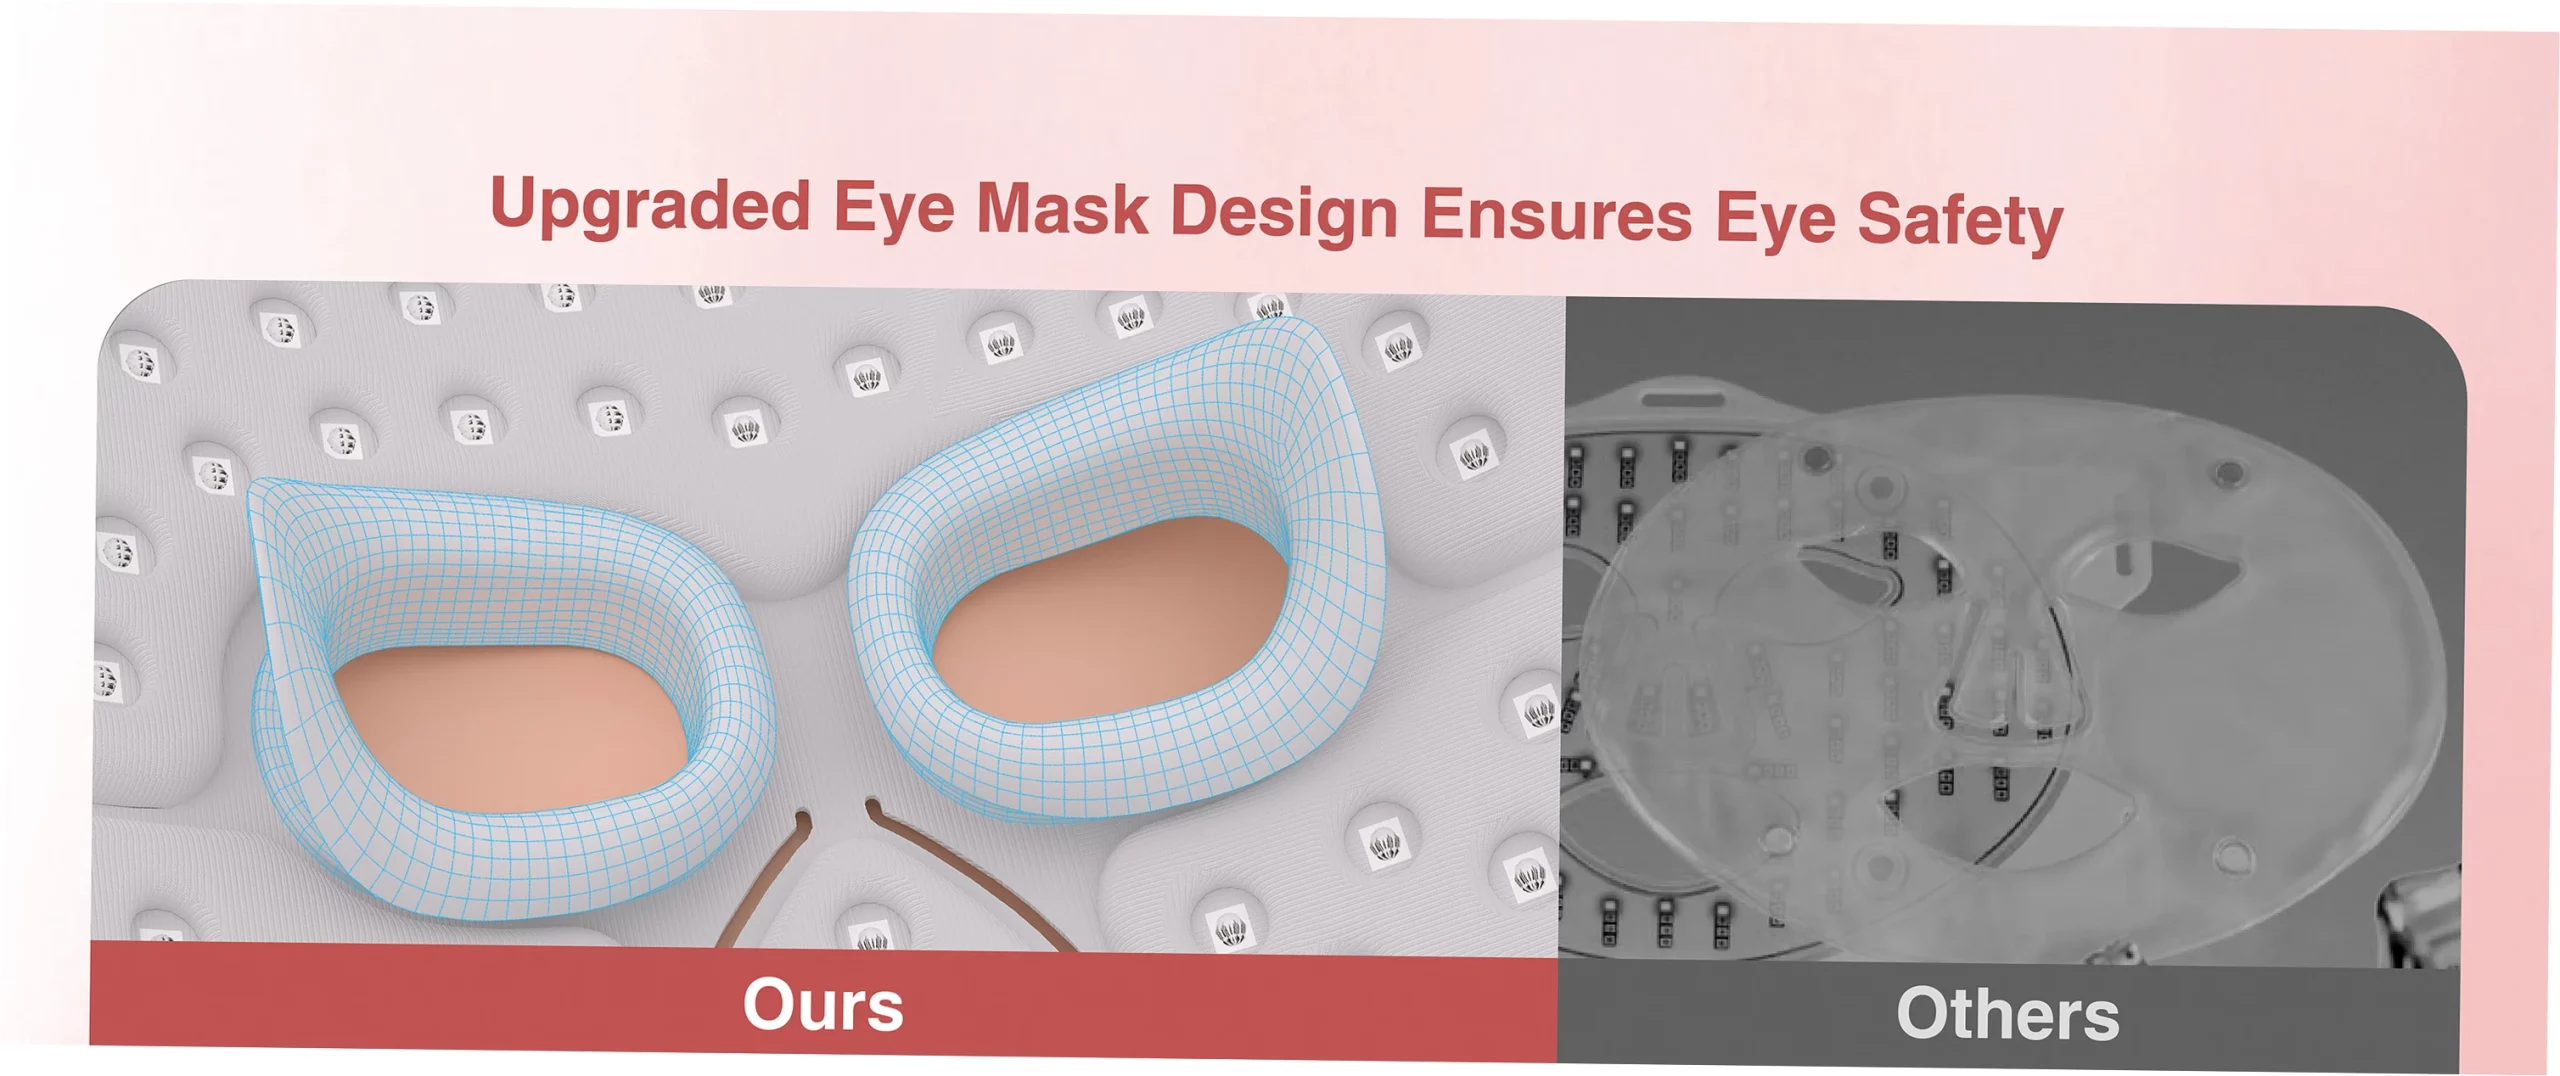
Helpful features like built-in timers, stands you can adjust, and comfy eye protection make it easier to stick with your routine, which is key for seeing those red light therapy before and after face improvements.
Warranty and Customer Protection
Most good red light therapy devices come with 1-2 year warranties that cover factory flaws and performance problems. Just make sure you know what’s actually covered, how to make a claim if needed.
and if you need a pro to set it up or do special maintenance. Sometimes you can pay extra for longer protection plans too.
Lots of companies give you 30 to 90 days to try it out and return it if you’re not happy with your red light therapy before and after face progress. Before buying, check the return rules, any restocking fees, and who pays for return shipping.
Good customer support helps you with any questions or tech problems, so you can stay consistent with treatments and get better before and after results for your face.
Red light therapy is a science-backed way to gradually improve your skin’s health and look, with changes that build up over time. Don’t expect miracles overnight, but if you use it regularly for several weeks.
you should see noticeable before and after differences in your skin’s texture, tone, and firmness. The secret to great red light therapy before and after face results is having realistic expectations, using it consistently, and choosing good equipment.
Have you been tracking your own red light therapy journey? We’d love to hear about your before and after experiences in the comments! Or check out our detailed guide on mixing red light with other proven skincare methods for even better results.
Frequently Asked Questions
How long until I see visible results from red light therapy on my face?
You’ll probably see your skin getting smoother and better hydrated in about 2 to 4 weeks. Keep at it for 8 to 12 weeks, and you should notice those fine lines fading and your skin feeling firmer.
How fast you see red light therapy before and after face results really depends on your age, your skin’s starting point, how good your device is, and how regular you are with treatments.
Take some before and after photos – they’re super helpful for spotting those little changes you might miss day to day.
What specific facial improvements can I realistically expect?
So what can you realistically expect from red light therapy before and after face treatments? Your skin should feel smoother, look less red and irritated, fine lines should be less noticeable, and your skin tone will even out.
Significant wrinkle reduction typically requires 3 months of consistent treatment. Just remember – red light therapy gives you great skin improvements, but it’s not going to give you the same dramatic results as surgery for sagging skin or really deep wrinkles.
Are there any side effects or risks with facial red light therapy?
The good news is red light therapy is pretty safe when you follow the directions, with hardly any side effects. Some people might get a little temporary redness or feel some warmth when they first start using it.
If your skin’s extra sensitive to light, you’re on medications that make you photosensitive, or you’ve had skin cancer before, definitely check with your dermatologist first. Oh, and don’t forget to protect your eyes during your sessions.
How do I maximize and maintain my red light therapy results?
To get the best red light therapy before and after face results, be consistent – start with 3 to 5 sessions each week. Prep your skin right and team it up with proven skincare stuff like vitamin C and hyaluronic acid.
Once you’re happy with how your skin looks (usually after 8-12 weeks), you can cut back to just 2 or 3 times a week to keep those results. And don’t slack on sunscreen and taking good care of your skin overall – that’ll help you keep your glowing skin for the long haul.